S-Chassis Ecoboost Swap How-To:
Step 1: Prepare the chassis.
The only thing you really need to do here is either bend the rack and pinion hard lines or, ideally, replace them with aftermarket lines so that the transmission adapter plate will clear them during engine installation. If you are looking to run a CD00x transmission, we do recommend Enjuku Racing's S-chassis transmission tunnel clearance kit. (Not needed by any means) , but it will make the car a lot more serviceable. If you plan to use a ZF5 or ZF6 transmission, this step is not necessary.
Step 2: Prepare the Drivetrain.
There are 3 key steps to getting the engine ready to go in the car. First, you will need to remove the OEM oil pan and pull off the balance shaft. Once removed, install a balance shaft delete plug. This is required as the engine is too tall with the balance shaft on to fit into the car properly. Now that the BDP is installed, we can install an oil pan. Being that this chassis has a rear steering rack location, it makes it difficult to run any sort of OEM pan, so we created a billet option for you! We have had customers create their own, which is perfectly doable!
Second would be deleting the vacuum pump; this isn't exactly "needed" if you're fancy with a cut-off wheel and a welder, but it is highly recommended as it will interfere with the firewall.
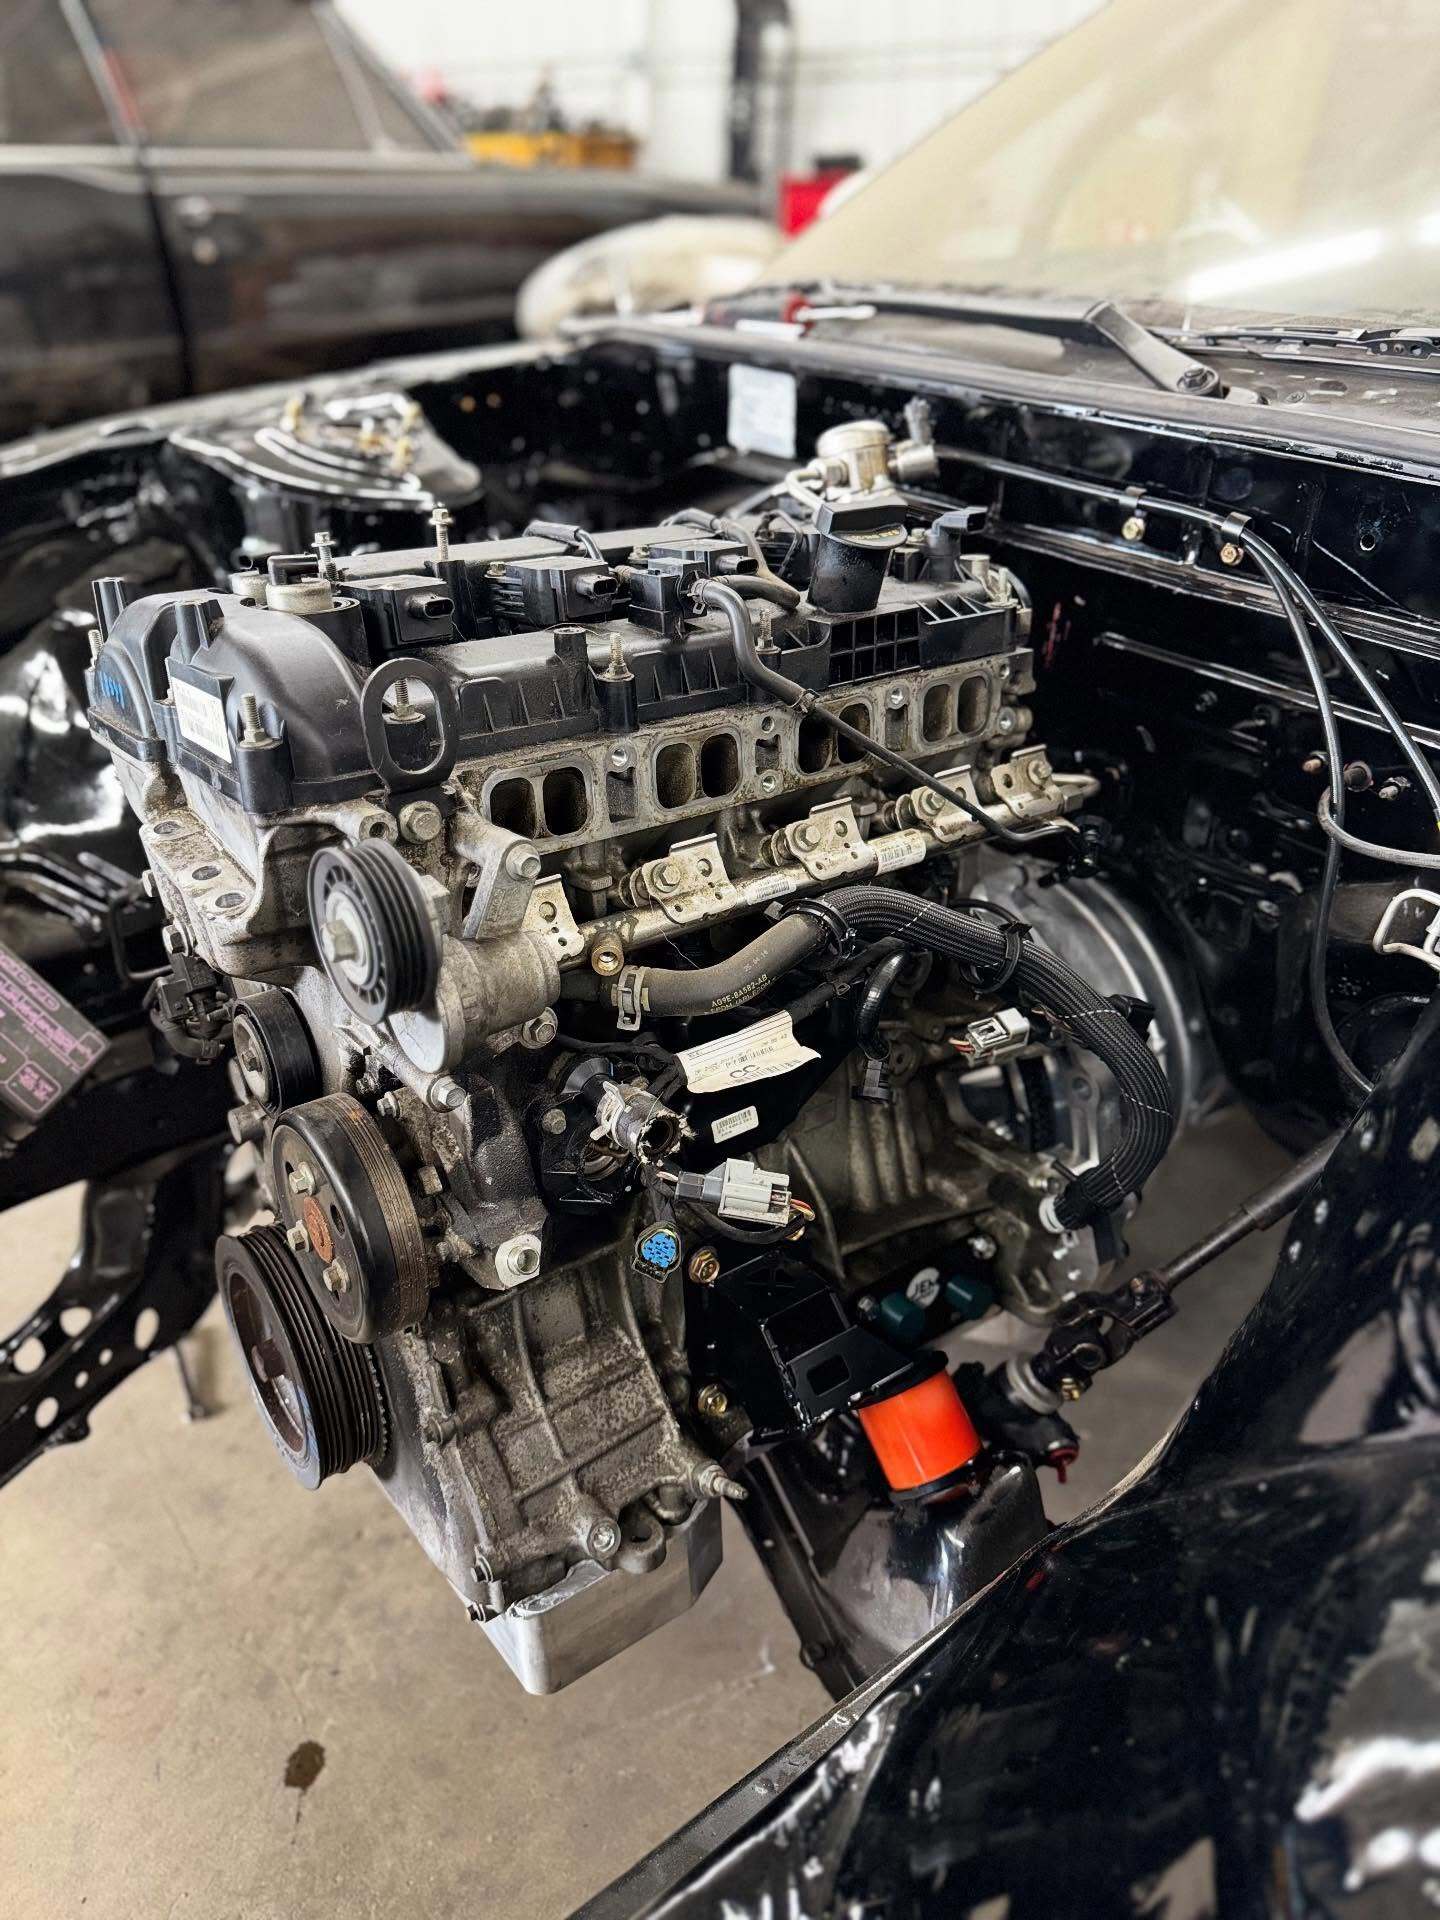
The last step here will be removing the OEM oil filter housing. As you can see to the right here in the image, the steering shaft allows very little room for that chunky housing. We offer a remote oil filter housing plate; to as it states, mount your oil filter remote.
As for Transmission's if you are running a CD00x we recommend this shifter as it fits perfectly in the OEM hole. If you are running a ZF5/6 then you will need to get a chassis mount shifter and either build a shift rod selector or order an adjustable one.
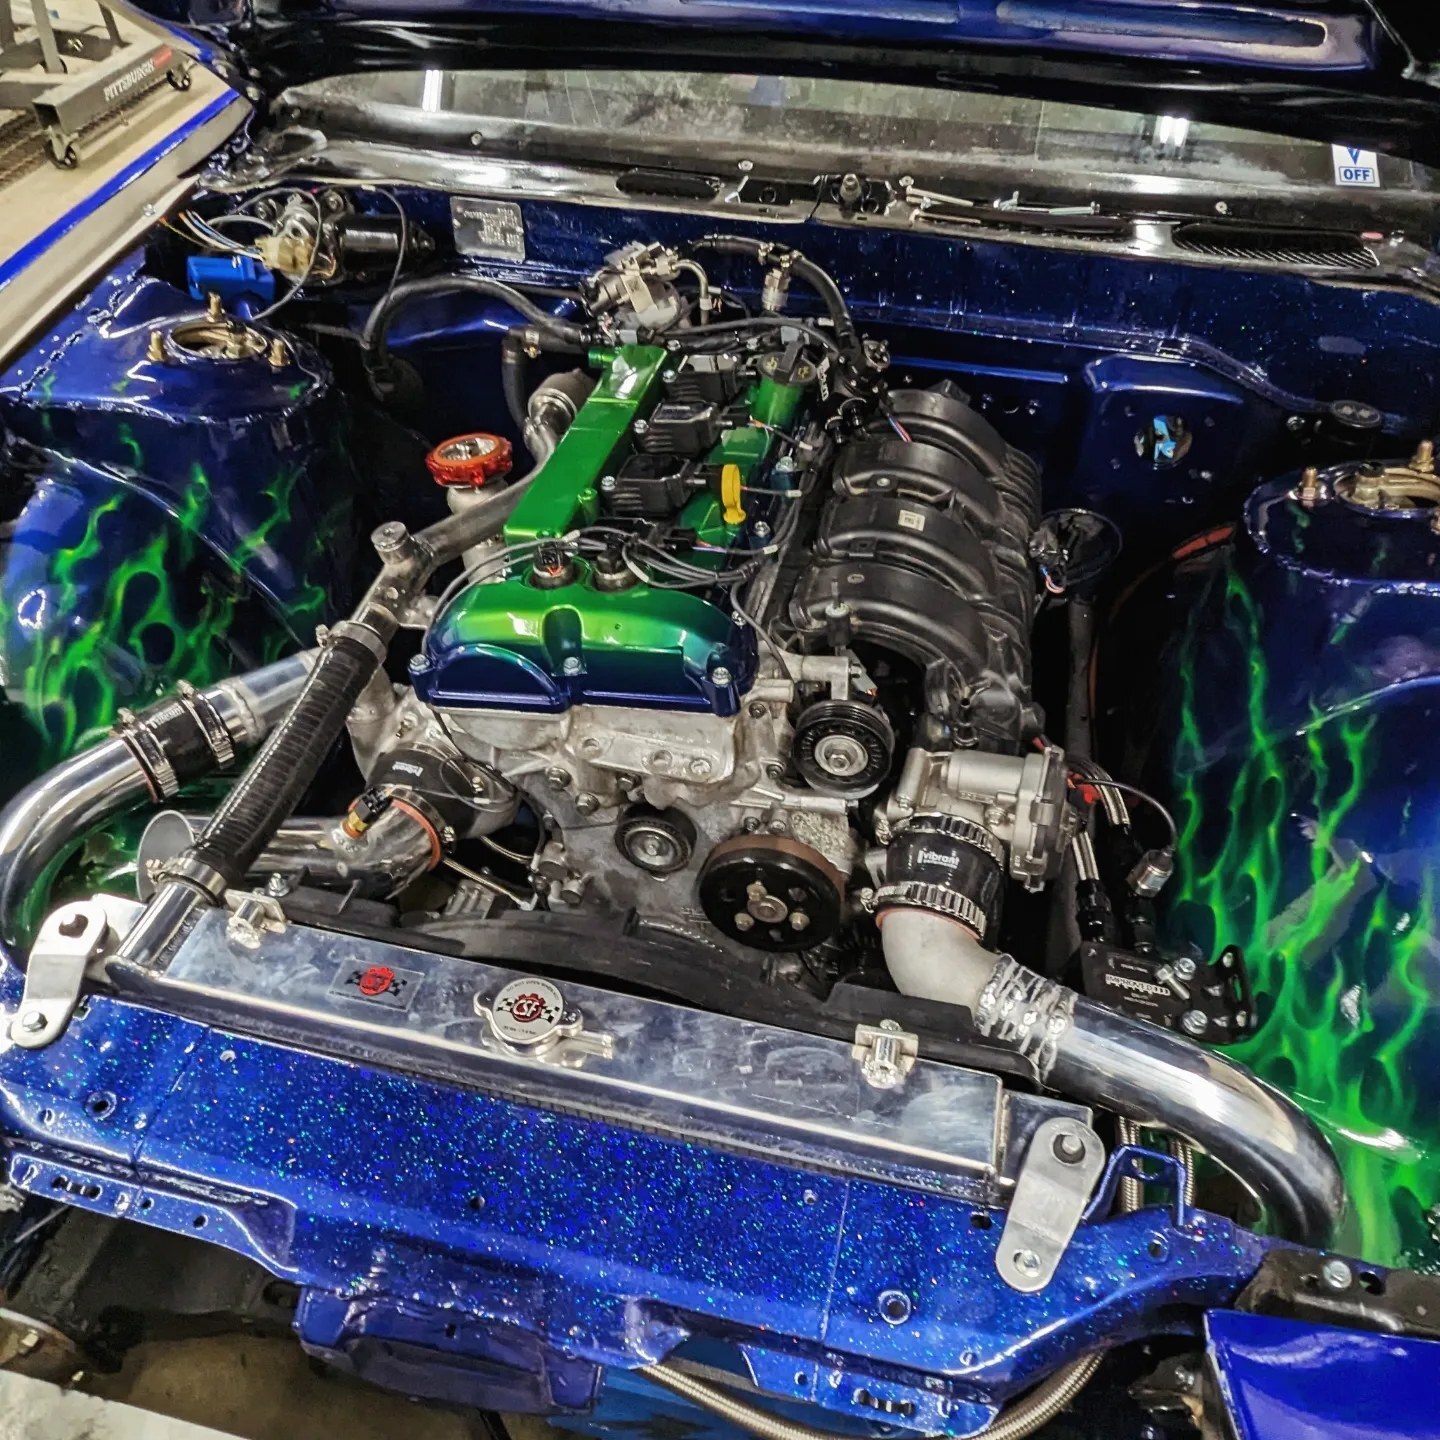
Okay, Toss that thing in the car!
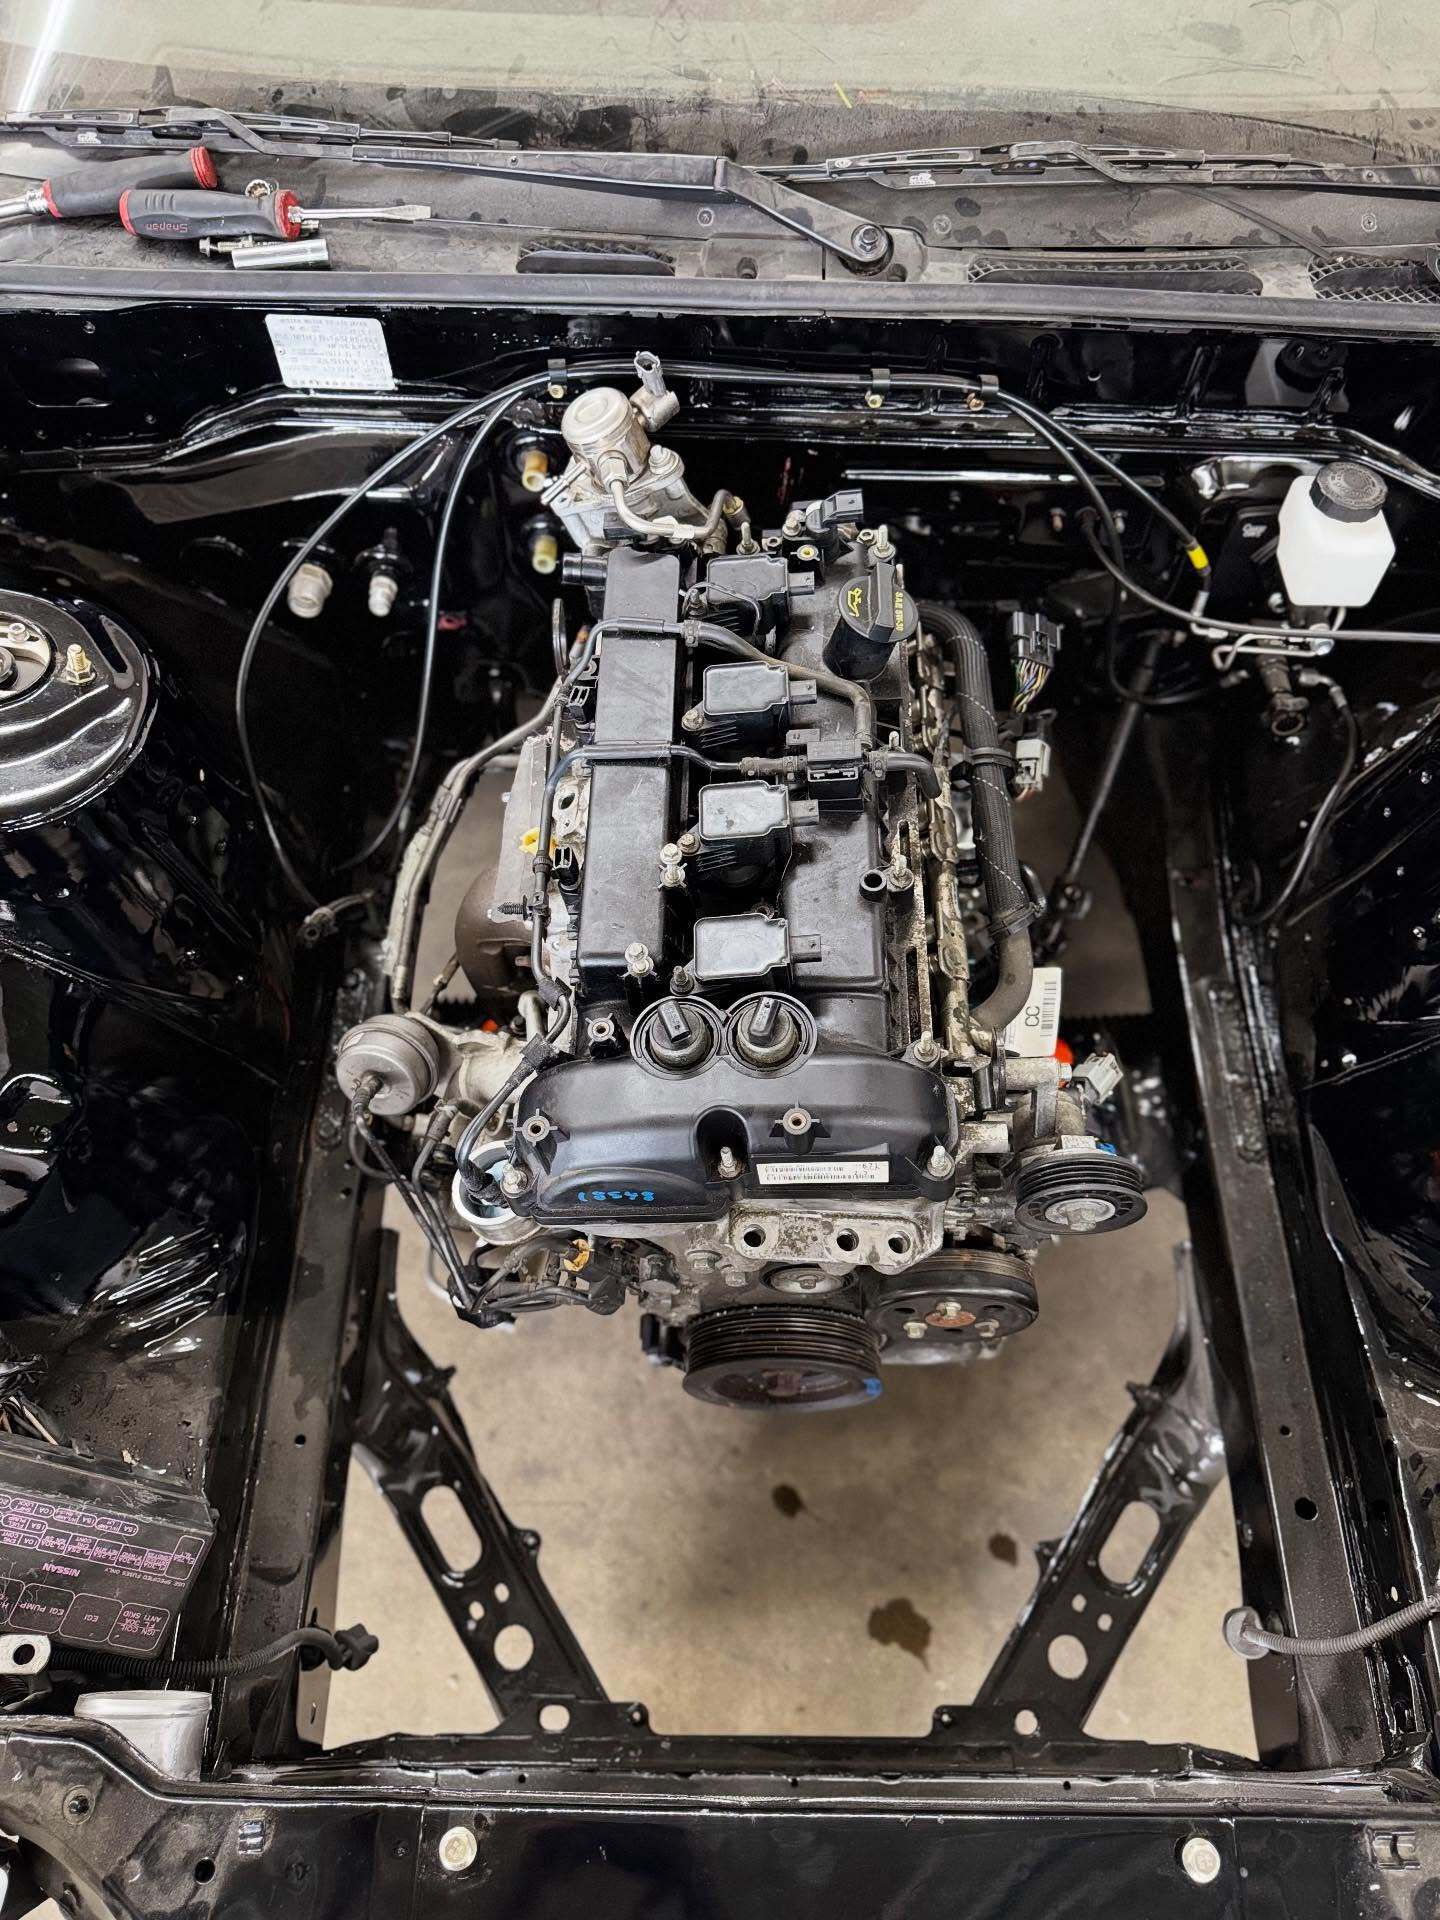
Now that the motors in, Let's talk plumbing.
Cooling:
Choosing your radiator. Shown in the image to the right is a factory S-Chassis radiator. The trick here is to move the lower radiator port. In factory form, both the inlet and outlet ports are Top Left & Bottom Left, looking at the image to the right. You will need to move the lower port to the opposing side of the radiator to have clean hose routing. Otherwise, your bottom hose will run across the front of the engine. Option 2 would be to swap in a Miata radiator, which will require modification to the upper and lower radiator mounts, but with this radiator, your hoses will be in the correct location.
To summarize, Option 1 will require aluminum welding to relocate the lower radiator port. Option 2 will require some sort of steel work (potentially no welding required). You might be able to get away with drilling a few holes and making brackets. Both options will require the use of our hose kit!
Being an aluminum long block, these engines have no issues staying cool. We have seen a wide variation of electric fans that have no issues bringing temperatures down in racing scenarios. However, we recommend that you still run a quality fan.
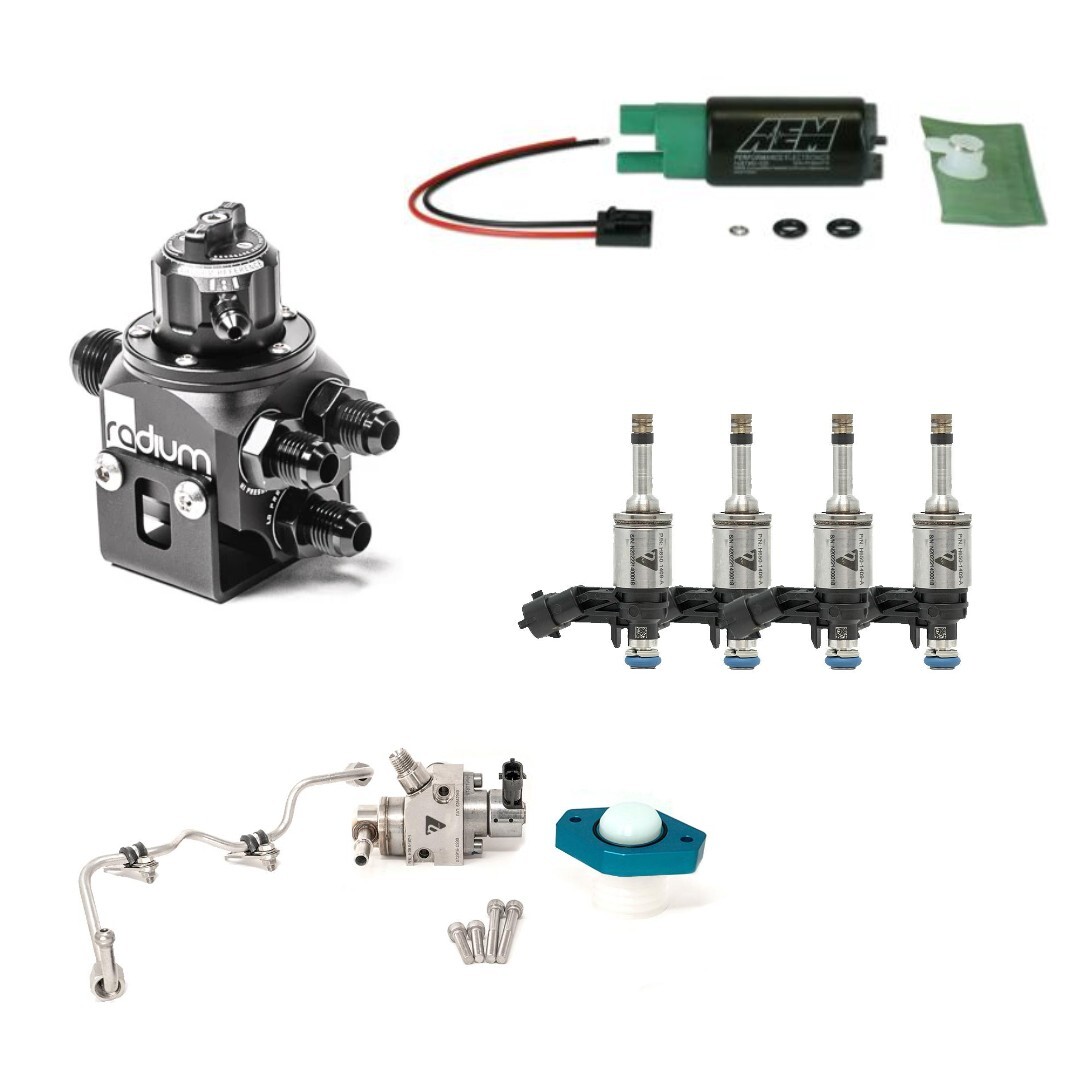
Fueling:
You might think that because the Ecoboost is direct injection, there's a different recipe for fueling than usual, but it's actually quite simple. To start, we recommend a minimum of a 255 L/ph fuel pump. The in-tank fuel pumps' job is to feed the HPFP(High Pressure Fuel Pump). We like to call the in-tank fueling side of the systems the "Low-side," and as for the HPFP's side, we call that the "High-side."
To regulate the low-side fuel pressure, we HIGHLY recommend using the shown Radium FPR. This regulator has many options for fuel line size & vacuum line port fittings. Another key feature of this regulator is the ease of adjusting fuel pressure. We insist that you set the base "low side" fuel pressure to 58psi and be sure to install a vacuum source.
Fuel line routing will consist of 2 lines coming from the fuel tank. A feed line and a return line. Both of these hoses will hook up to one side of the regulator, and on the other side of the regulator, you will need to run 1 hose to the HPFP.
So you got the car full of fluids and wanna start it?
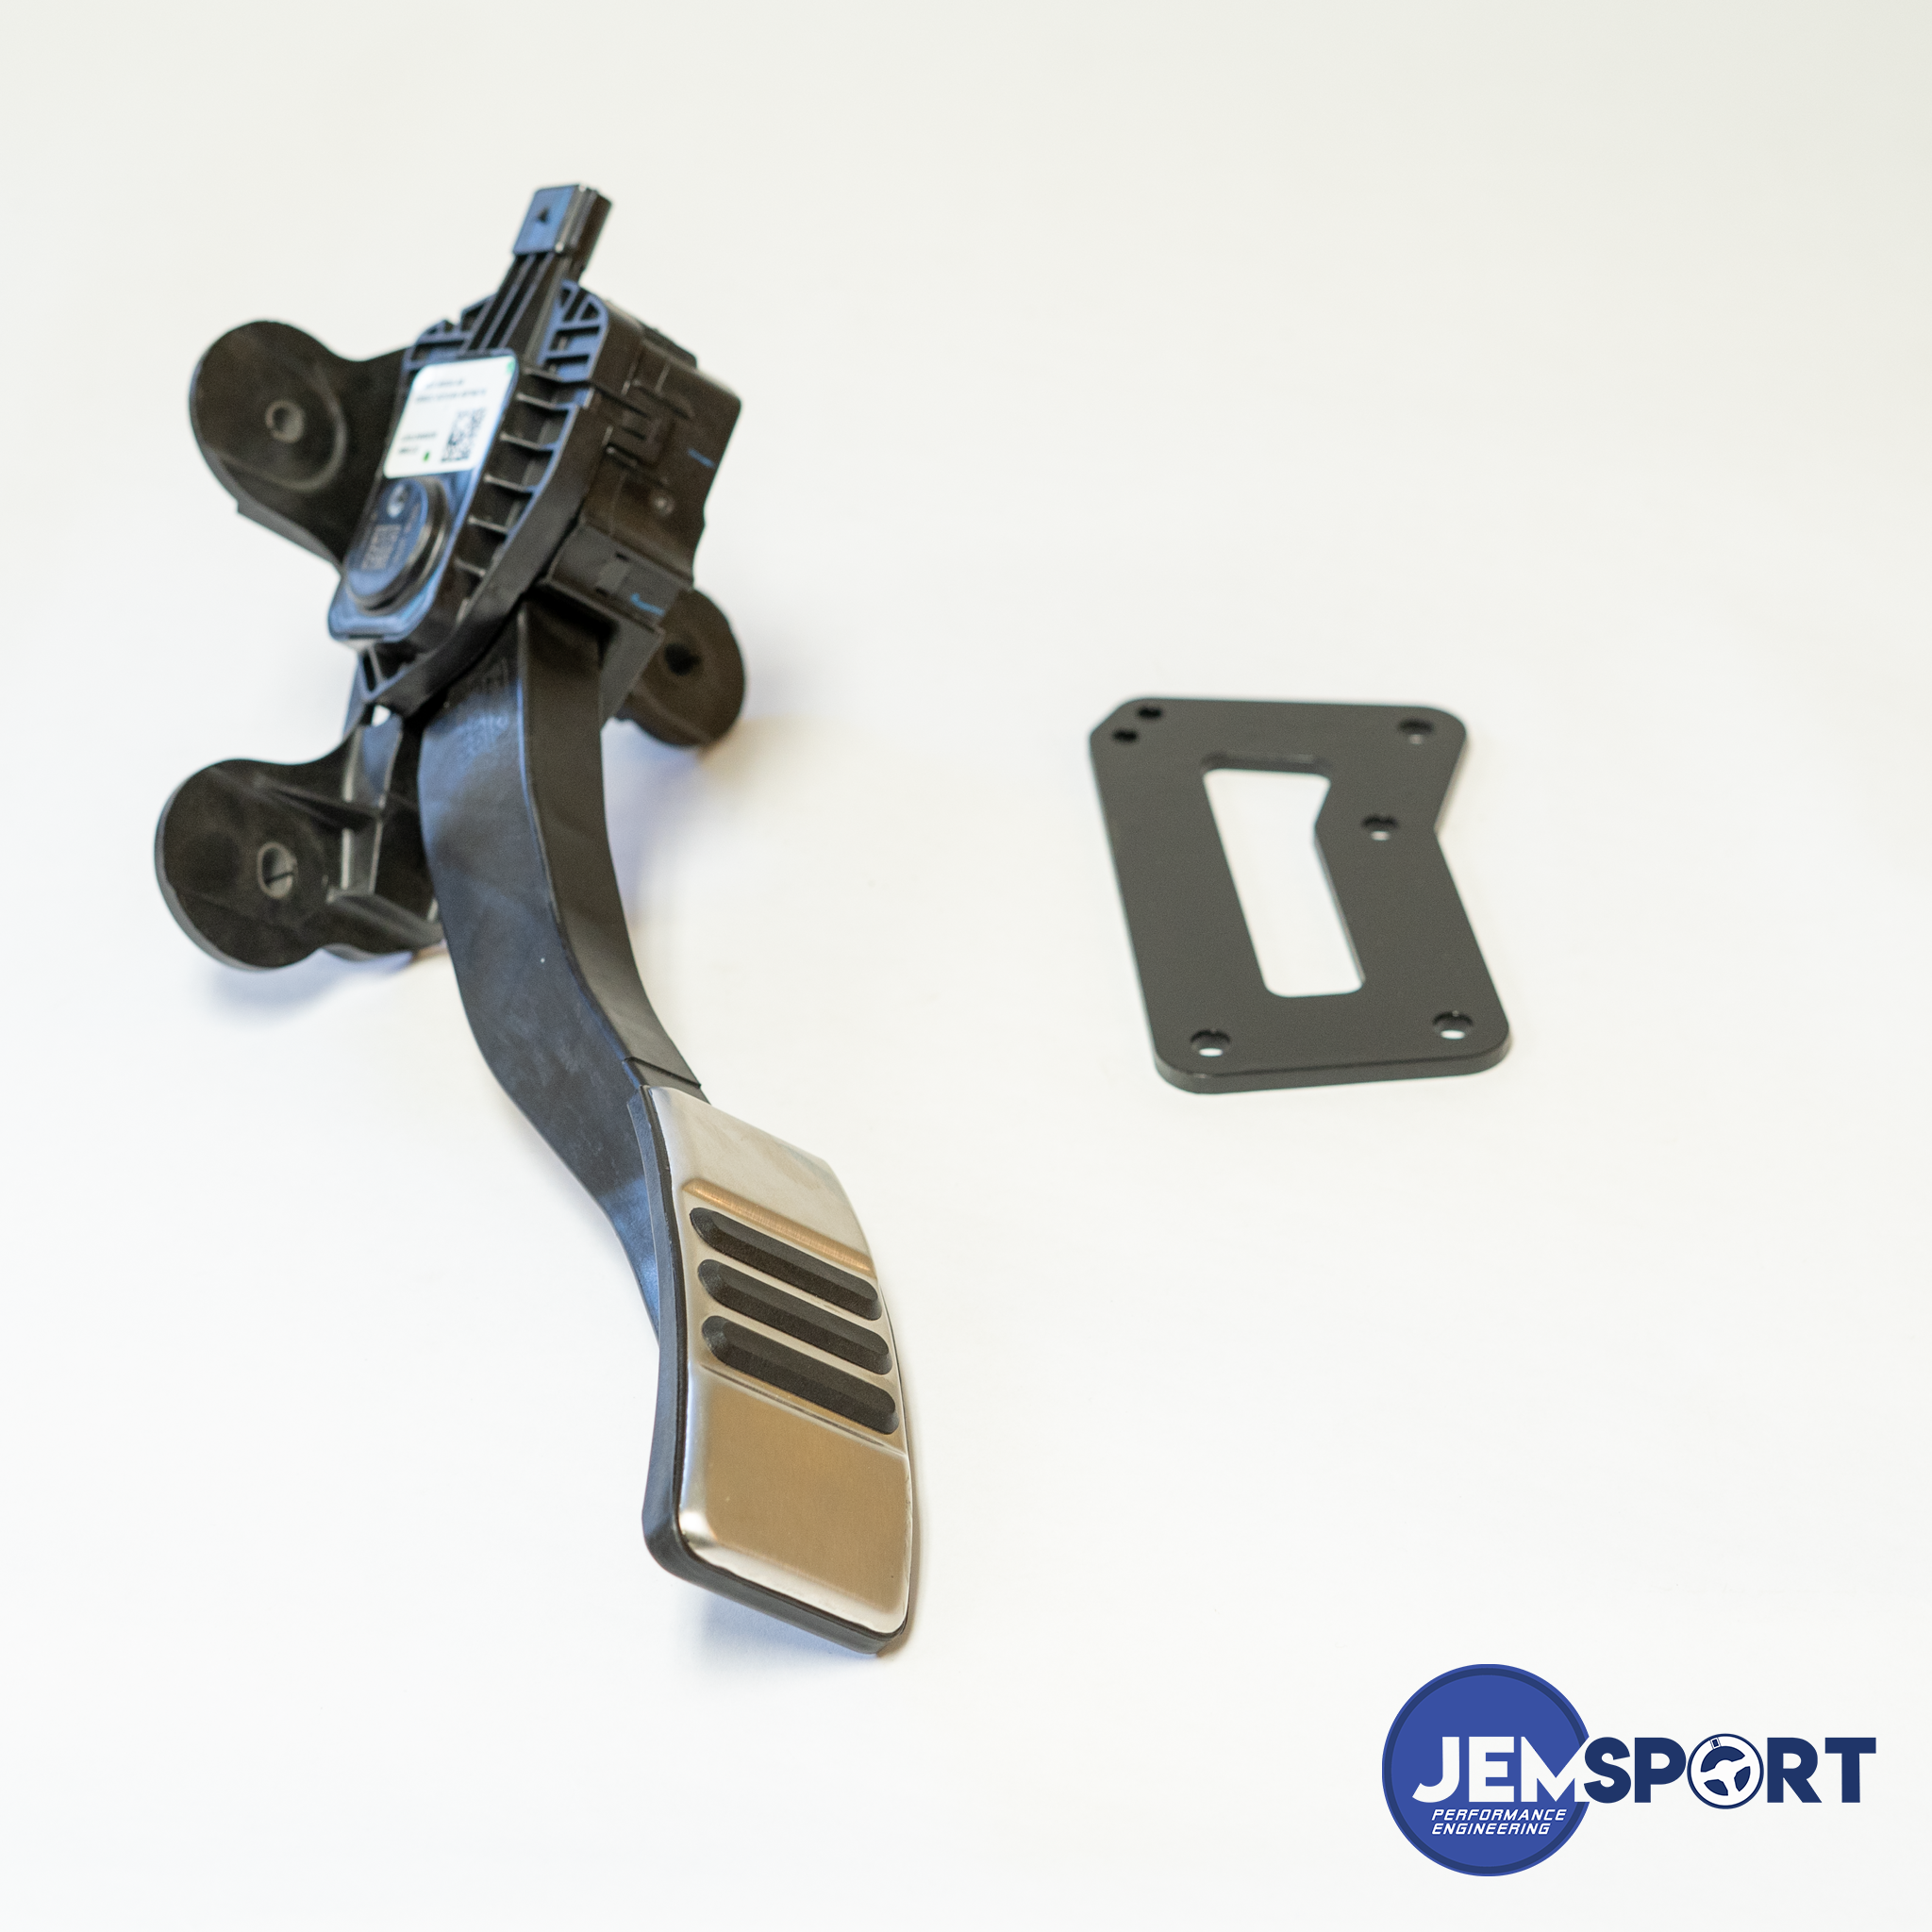
Before we get the wiring harness installed, we need to get a gas pedal in this thing. A modern engine comes with modern solutions, E-throttle! We supply a bracket that works for S13/14 chassis. This bracket accepts pretty much any Ford gas pedal from 2011 to the present.
For now, let's just say you would want to source a Ford: Focus / Escape or Mustang pedal. The escape pedal has a smaller foot base than the larger foot base you see to the right in the image here ( mustang pedal ). Don't worry, the connectors on all pedal's are the same.
Wiring!
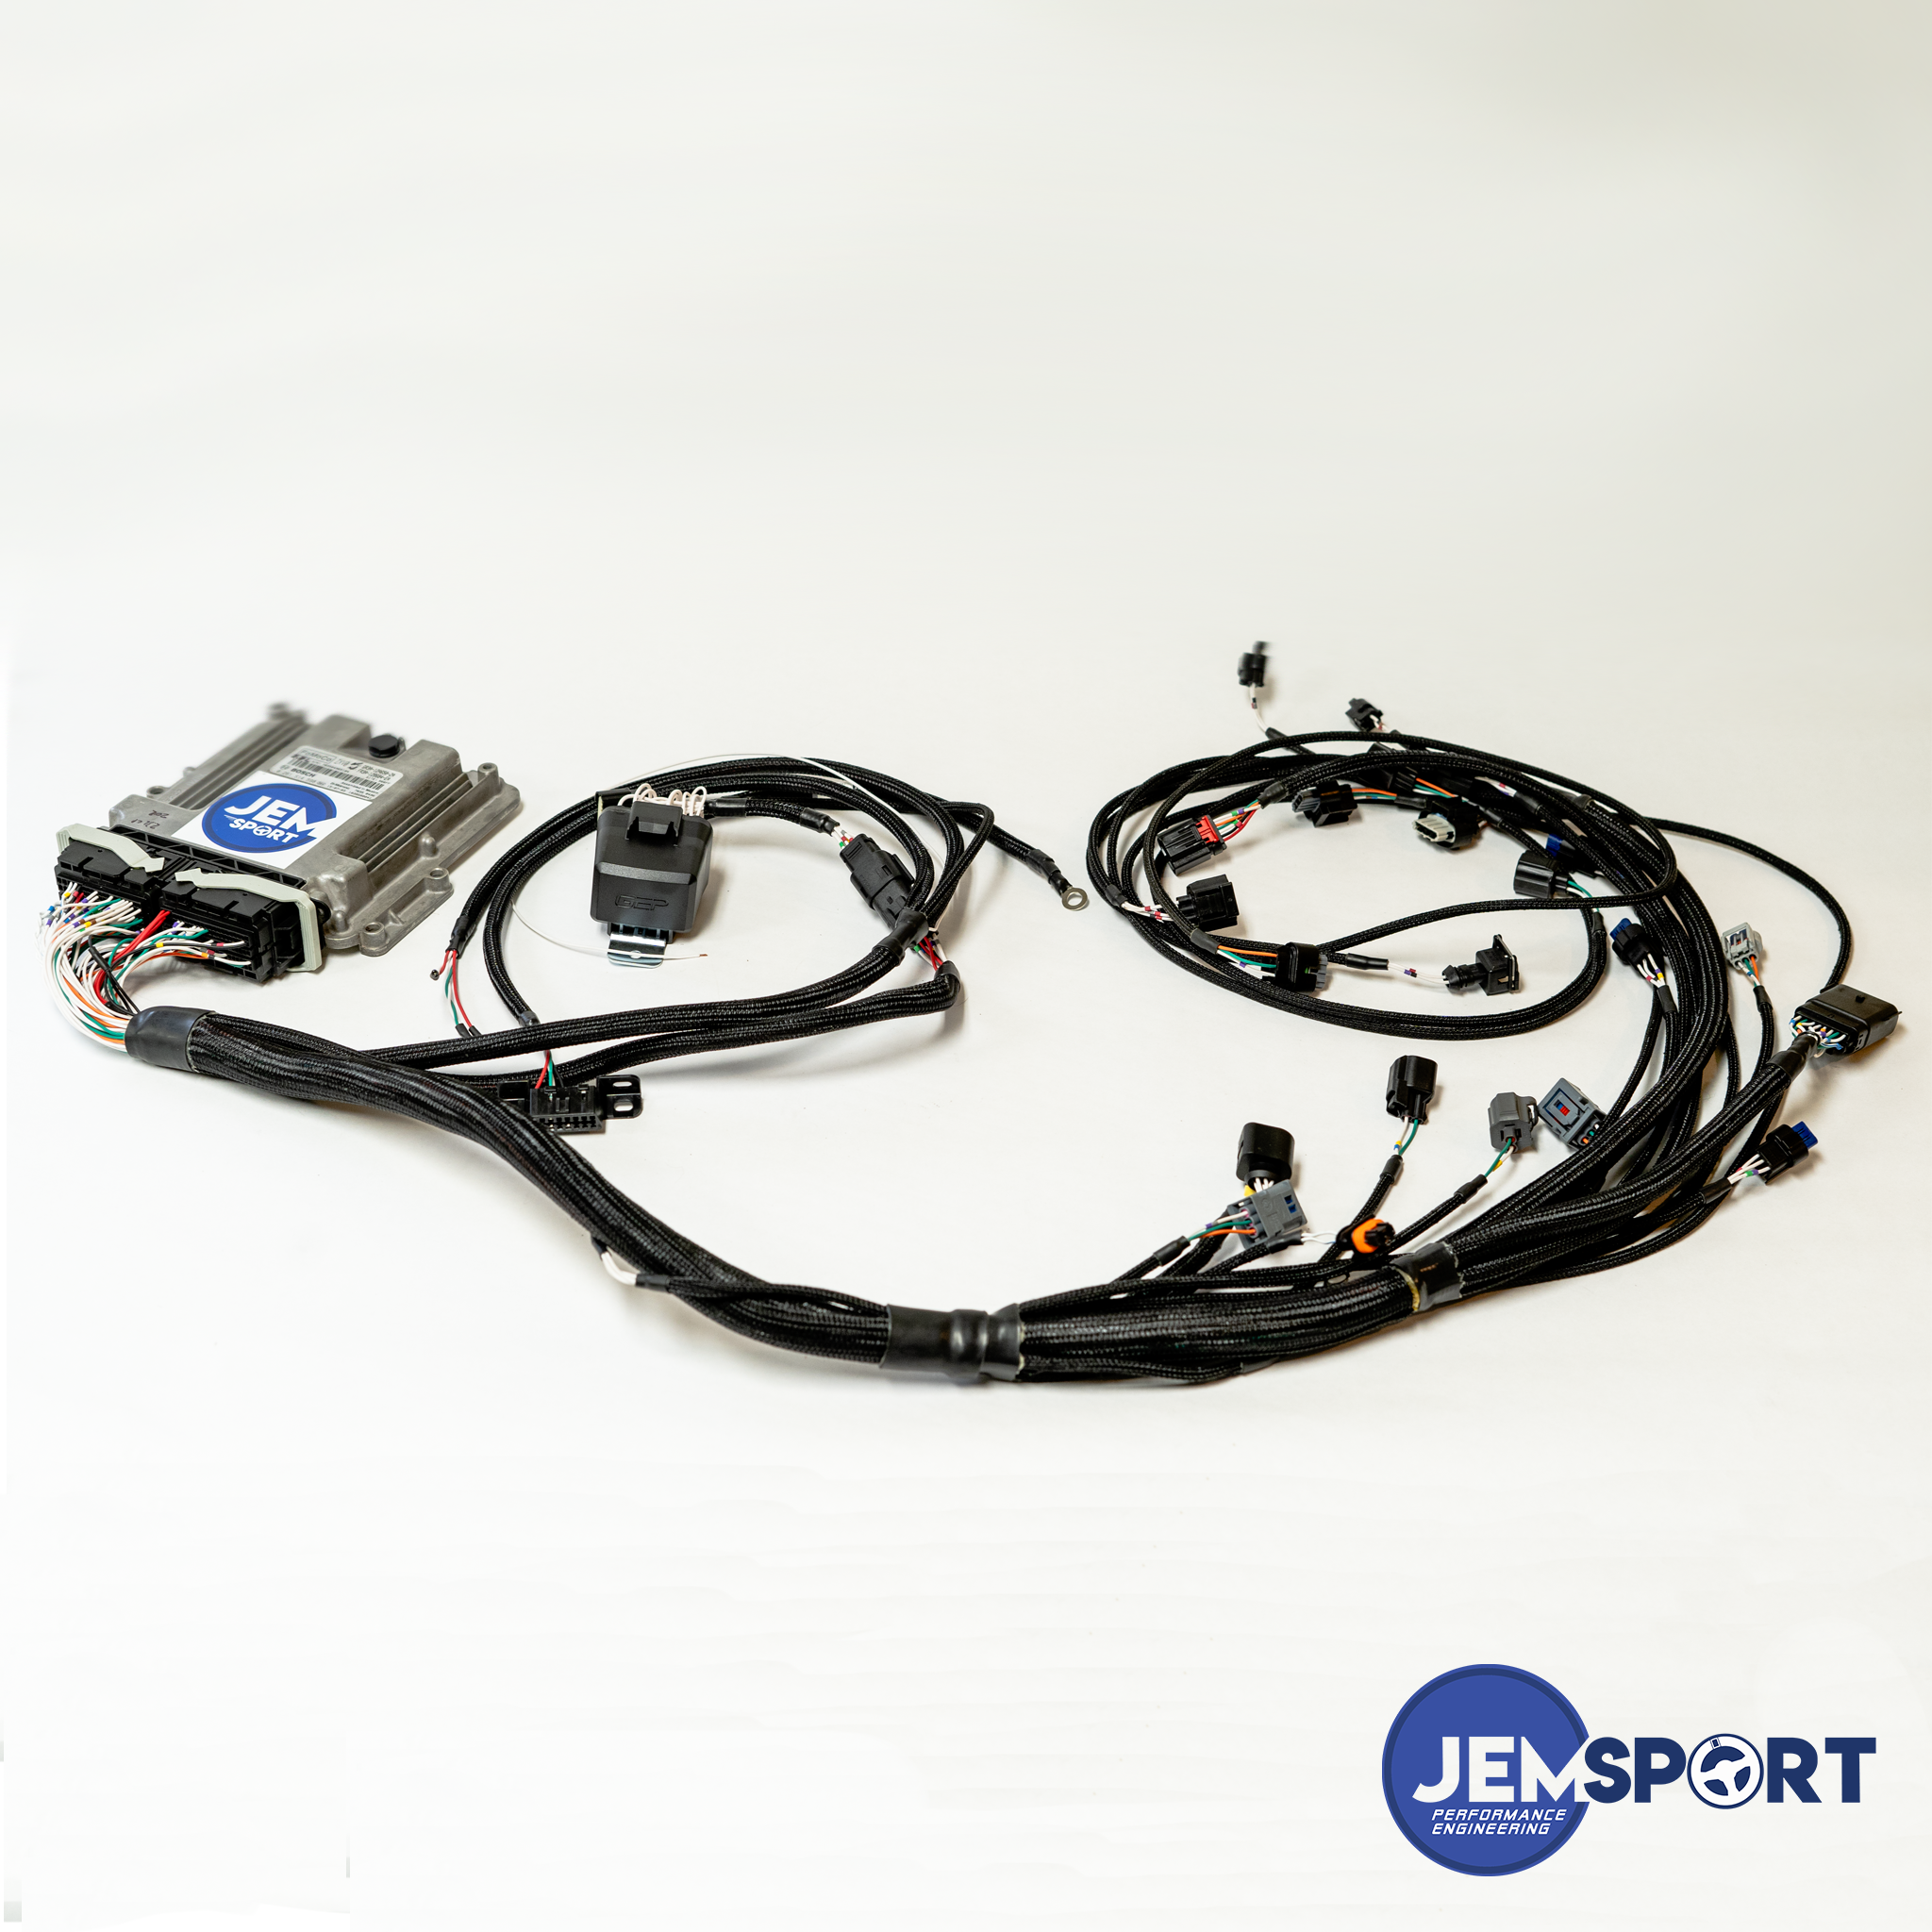
Option 1:
JEM-Sport 2.3/2.0 Ecoboost swap wiring harness & ECU. This is a great option for anyone looking to just cruise around or even have a few track days. We have tested this package over the last 4 years with great success on racecars. This package replaces the OEM engine harness. The only thing you will need from the OE harness is the injector harness. Within this section of the harness are the connectors for your fuel injectors / knock sensors & fuel rail pressure. Our engine harness has a connector to plug right into the factory UMC(under manifold connection).
For more details on this harness, see HERE.
If you are looking to purchase this harness, be sure to select the correct engine. If you do not have an ECU already, then you will need to make sure to click " Include unlocked ECU". Once the harness is installed, this package is ready to go. No tuning required. IF you do have an ECU already, you can add the harness to your cart, but make sure to add our PATS unlock service as well, otherwise your engine will not run.
Option 2:
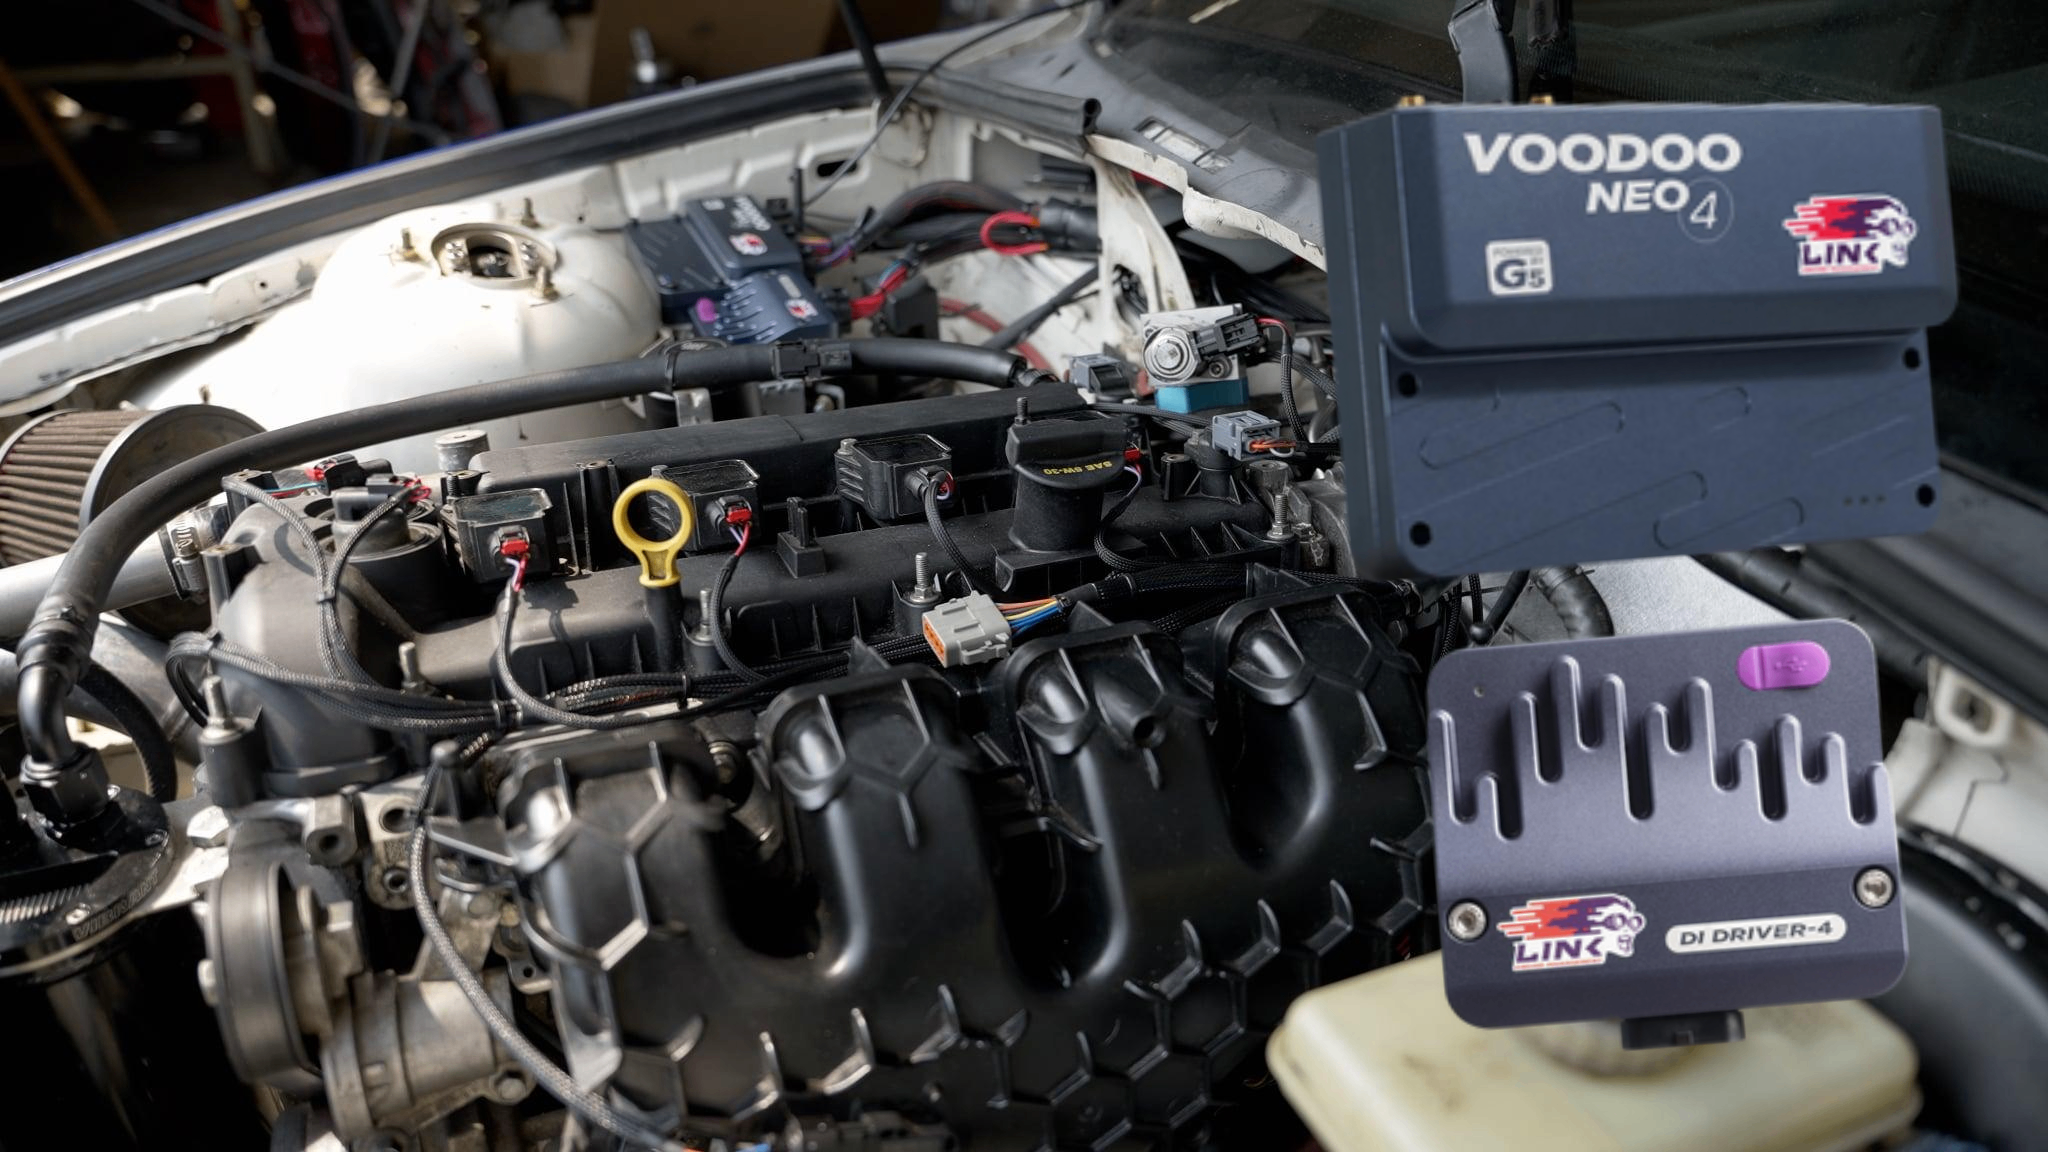
JEM-Sport / Link ECU NEO 4 Ecoboost swap harness package. This is the option for anyone looking to unleash the full potential of their engine. With the NEO 4, anything is possible. This is a must-have for a dedicated track car as it will allow for proper management & give you everything you need for fast diagnostic times if you were to run into any issues.
Just like option 1, you will need the UMC harness.